
Finding studs behind drywall or sheetrock is an important step before hanging a TV, installing a wall mount, putting up shelves, or mounting a large picture. In this guide, we cover three simple ways to locate wall studs: using a magnetic stud finder, using an electronic stud finder, and using the classic knock-on-the-wall method. Each method has its own advantages, and the best choice depends on your tools, budget, and comfort level.
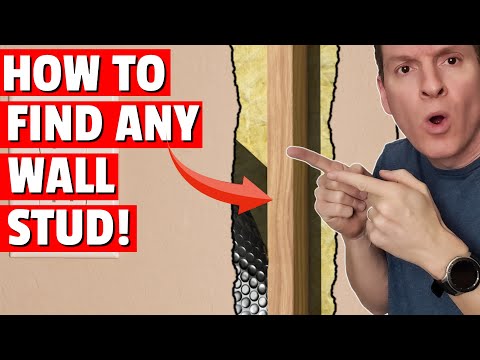
Before you drill into drywall, it is important to know what is behind the wall. Drywall alone is not strong enough to hold heavy objects. If you are hanging a large picture, a heavy mirror, a shelf, or a big screen TV, you need to anchor into a wall stud for better support.
Wall studs are the vertical framing members behind drywall. They are usually made from wood or metal and provide the structural support needed for secure mounting. Finding the stud location before drilling helps prevent loose mounts, damaged drywall, and failed installations.
One of the easiest ways to find a stud behind drywall is to use a magnetic stud finder. In the video, the example used is the Stud Buddy. This type of tool is simple, affordable, and does not require batteries.
The concept is straightforward. Slide the magnetic stud finder across the wall until it sticks. When it sticks to the wall, it has likely found the head of a drywall screw or nail. Since drywall screws and nails are usually fastened into studs, this gives you a strong indication of where the stud is located.
Another nice benefit is that you can leave the magnetic finder stuck to the wall above or below the location where you plan to drill. This can eliminate the need to mark the wall with pencil or tape.
The second method is to use an electronic stud finder. In the video, the Zircon MultiScanner stud finder is shown. Electronic stud finders can detect more than a basic magnetic tool. Depending on the model, they may locate the edges and center of wood or metal studs. Some models also include deep scan features.
To use an electronic stud finder, place it flat against the wall, turn it on, and move it horizontally across the drywall. Keep the tool pressed against the wall as you move it. When it detects a stud, the device will alert you so you can mark the location with a pencil.
Electronic stud finders vary widely in price. Basic models can cost around $20 to $30, while more advanced models can cost much more. For most DIY jobs, a simple electronic stud finder is usually enough.
| Stud Finder Type | Pros | Cons |
|---|---|---|
| Magnetic Stud Finder | Low cost, no batteries, simple to use, easy to keep in a toolbox | Finds screws or nails, not the stud itself |
| Electronic Stud Finder | Can detect stud edges, center, direction, wood, or metal depending on the model | Costs more and usually requires batteries |
| Knock Method | Free and requires no tools | Less reliable, especially for beginners |
The downside to an electronic stud finder is that it is more expensive than a magnetic stud finder and usually requires a battery. However, the upside is that it can provide more detailed information. More expensive models may also help detect plumbing or electrical wiring, but those models are typically much pricier.
The third method is the old-school knock-on-the-wall method. This method does not require any tools. Simply knock on the drywall and listen for the sound. When the wall sounds hollow, you are likely between studs. When the sound changes to a more solid thud, that may indicate a stud.
This is the cheapest method because it is completely free. However, it is also the least reliable, especially if you are new to DIY projects. It takes practice to hear the difference between a hollow section of wall and a solid stud location.
The knock method can be useful when you are trying to find studs quickly, but for better accuracy, a magnetic stud finder or electronic stud finder is usually the safer choice.
You should locate a wall stud any time you are mounting something heavy or anything that needs a secure hold. Drywall anchors can work for lightweight items, but they are not always the best choice for heavier projects.
When in doubt, find the stud before drilling. It only takes a few extra minutes and can save you from wall damage or a failed mount.
For most homeowners and DIY users, the best choice is either a magnetic stud finder or a simple electronic stud finder. A magnetic stud finder is inexpensive, easy to use, and does not need batteries. An electronic stud finder costs more, but it can provide additional information, such as stud edges and center position.
The knock method is useful in a pinch, but it is less reliable. If you are mounting something expensive or heavy, use a tool instead of guessing.
Finding studs behind drywall does not have to be complicated. A magnetic stud finder is one of the easiest and cheapest options. An electronic stud finder gives you more information and can help locate the center and edges of studs. The knock method is free, but it takes practice and is not always accurate.
Before drilling into drywall or sheetrock, especially when hanging something heavy, take the time to locate the stud. It makes the installation safer, stronger, and much more reliable.
If you are trying to figure out how to find studs behind your drywall or sheetrock, you have come to the right video. Today, I am going to show you three of the easiest ways to find studs behind your walls.
All right, guys and gals, the first way to find studs behind your drywall or sheetrock is to use a magnetic stud finder. This one is called the Stud Buddy. It costs around $10, and best of all, it does not need batteries.
The concept is pretty simple. Slide the Stud Buddy across the wall until it sticks, and then you can let it go. This means the Stud Buddy has found the heads of the screws or nails in the drywall and accurately indicates the stud's location. It is flawless and so easy.
Plus, you can let it hang above or below the location where you want to drill, and there is no need to mark the location with a pencil or tape. It is so retro, so easy, and so simple. The Stud Buddy product link is in the description below.
The second way to find a stud behind drywall or sheetrock is to use an electronic stud finder. This is the Zircon MultiScanner stud finder. It locates the center, edges, and direction of wood and metal studs. This also includes a deep scan feature.
This stud finder costs around $55, but there are different variations with different features and options. The cost can go from around $20 all the way to $180. I recommend a simple $20 to $30 stud finder. Nothing fancy is needed for most basic jobs.
So how do you find a stud? Simply place the stud finder on the wall and turn it on. Then move the stud finder horizontally until it finds a stud. Make sure the stud finder is always pressed against the wall. Voila, we found a stud. Now you can mark it with a pencil, and then you can start hammering or drilling.
The downside to this product is that it is more expensive than the Stud Buddy, and it requires a 9-volt battery. The upside is that it can detect wood or metal. It also shows the direction of the studs, as well as the edges and center, so it is a bit more thorough.
More expensive stud finders can detect plumbing and electrical, but they are pretty pricey. The Zircon product link will be in the description below.
The third way to find a stud behind your drywall or sheetrock is the old knock-on-the-wall method. Simply knock on the drywall and listen for a hollow sound. When you get to a thud, that is a stud.
This is the cheapest method, but it is also less reliable, especially for beginners. This is how I find studs on the fly, but for the most part, I use my Stud Buddy or my electronic stud finder.
Use one of these three methods when you are hanging a big screen TV or when you are hanging a very large and heavy picture. If you want to learn how to install a full motion wall mount bracket, watch the video linked in this video.
With that, guys, make sure to like, share, subscribe, and comment. For God's sake, smash the bell icon, and I will see you in the next video real soon. High five. Peace.

Welcome back to The Ultimate Tech Hub. On today\'s episode we will connect a Cat6 ethernet cable to a Cat6 Wall Jack and we ...

This is How to Build an Amazing Home Theater in only 12 Hours with only 6 items and a $4000 budget! Can we do it? Watch to ...

Hello everyone and welcome back to the Ultimate Tech Hub. Today we will show you how to build a beautiful custom 9-foot ...

Welcome back to Ultimate Tech Hub, on this episode we will un-box and setup the TerraFlame Wave Fire Bowl. The TerraFlame ...

Before You Buy a Smart Refrigerator or Any IoT Device You Need to Watch This Video. My Favorite Smart Appliances and IoT ...

Welcome back to The Ultimate Tech Hub. On today\'s episode we will replace our broken plastic flag pole mount with an Aluminum ...