
Installing an Ethernet wall jack is a simple way to improve your home or office network. This guide will walk you through the process of wiring and installing a Cat6 or Cat5e wall jack step-by-step.
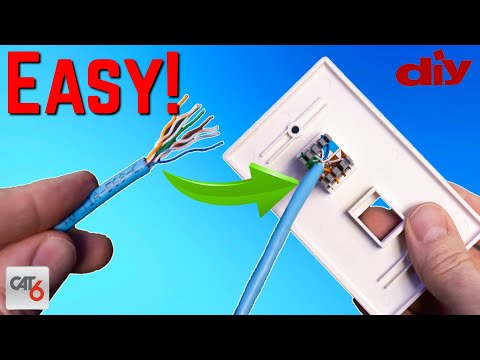
Follow the T568B standard wiring sequence:
| Left Side | Right Side |
|---|---|
| Brown-White | Blue-White |
| Brown | Blue |
| Orange-White | Green-White |
| Orange | Green |
Installing an RJ45 wall jack is a **quick and affordable** way to improve your home network. With just a few simple tools, you can create **a professional and reliable** Ethernet connection for high-speed internet.
what's up guys welcome back to the channel i'm mike this is the ultimate tech hub thank you for joining us i really appreciate it so we got a lot of emails from viewers and subscribers that want to know how to install a wall jack correctly we've done a few videos that show how to install a wall jack however they were not standalone videos the wall jack installation was part of a bigger process therefore the video was longer so in today's video we're going to show you how to install a wall jack we're going to go through all the parts and tools needed i'll give you the pricing for each part and tool and there'll be links down below where you can buy these products and believe it or not this is not very expensive and after you're done watching this video make sure to watch this one this video shows you how to wire up a patch cable simple and easy so without further ado let's get started so guys for this installation it's very simple all you need is an rj45 wall jack this is a cat6 as you know in our house we have no cat 5v it's all cat6 and you're also going to need some cable whether it's cat5e or cat6 and regardless of which cable you have cat5e or cat6 the wiring is all the same you also need a wall plate one port two port or whatever you want because this will snap in after you're done and you're also gonna need a punch down tool now i know what you're going to say this is not very big it's kind of small they make a larger punch down tool but really this works just fine and the great thing about these they're free when you buy a wall jack plug it comes with a punch down tool and the last thing you need is a wire stripper i'm going to go ahead and use this crimping tool because it already has a wire stripper right here all right guys enough of the chit chat let's get started alright guys the first thing you want to do is strip back the wires about two inches in fyi most crimping tools have a wire stripper built right into them pretty cool so now all four pairs of wires are exposed go ahead and cut off that white pull string you won't need it and now you can carefully unwrap all eight wires once all eight wires are unwrapped you then want to straighten them out and a little trick i learned use that blue wire cover you just pulled off to help straighten the wires it works great and is easy on your fingers after you straighten out all eight wires you need to separate the wires four to the left and four to the right so on the left going from top to bottom is brown white brown orange orange white and on the right side going from top to bottom is blue white blue white green and green and now you're ready to insert all eight wires into the castings wall jack make sure to push the wires down as far as possible using your fingers [Music] and then once they're all pushed down go back with the punch down tool to seat the wires all the way down as far as possible and i usually do this twice to make sure they're all pushed down after they're all pushed down trim off the excess wires and now you can insert the wall jack into the wall plate like this these wall jack plugs come with a wire cover for the top but for some reason i lost mine it's probably somewhere in my toolbox but here's a video clip of that process and this is the finished product and once again guys if you have any questions leave them in the comments below i answer all questions and guys if you like this video give a thumbs up and share it if you love it hit subscribe to keep this channel alive once again guys thank you for watching i really appreciate it you guys are awesome and i'll see you in the next video real soon peace [Music]

These are 3 Secret Router Settings to speed up your Internet. When your Internet speeds are not as fast as they should be, you ...
HDMI over Ethernet is a useful technology for extending HDMI signals over long distances using Ethernet cables. By compressing ...

On this episode of Ultimate Tech Hub we will make 2 custom length Cat6 Patch cables for our network box. We will take you ...

How To Build a Home Network for Beginners (2026 Guide). Learn how to build a Home Network for beginners step-by-step!

This is the "Easy Ethernet Wall Jack Installation" that uses a 45-degree Cat6 Keystone Jack from SatMaximum and this is the ...

On today\'s episode of the Ultimate Tech Hub we are going to show you where the ethernet jack goes to in your house. We have ...