[Music]
a wise man once told me
a great wine
goes with anything
and i believe
he was correct
introducing
the world's first
and only
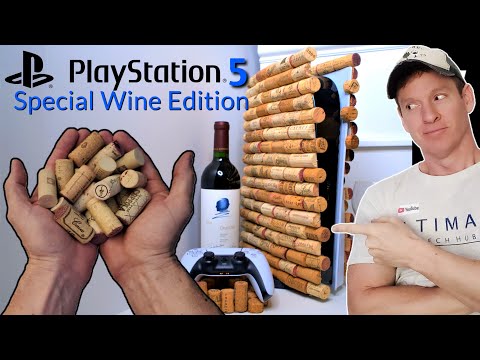
playstation 5
special wine edition
modification
brought to you by the one
and only
ultimate tech hub
[Music]
so whether you're drinking a bold red
wine
while playing call of duty cold war
or you're sipping a chardonnay while
playing astros playroom
this playstation 5 special wine edition
will help you enjoy the fruits of your
labor
so whether it's a bottle of red
or a bottle of white
it all depends upon your gaming appetite
and today we're going to show you how to
make this beautiful wine modification
for your playstation 5.
and before we get started
make sure to hit subscribe
and the bell notification
thanks
so now let's go over the supplies and
tools
needed for this modification
in this wine modification
works with both versions of the ps5
digital or console
all right the first thing you're going
to need is a lot of corks
so get to drinking
just kidding
hopefully you already have some wine
corks saved up over the last couple of
years
if not you can visit the wine store
and see if they have any corks available
or maybe ask a friend or a family member
next you'll need a hot glue gun and a
packet of glue sticks
we use gorilla brand
because it works well and is cheap
we spent a total of fourteen dollars on
this glue gun and these glue sticks
you also need a serrated knife to cut
the corks
next you'll need a large piece of white
cardboard
we used a smaller piece of cardboard
that was a little bit wider than our ps5
console
but was too short
so we used a small piece as a template
to cut out the first side panel
we can then go to the ps5 and then trace
around it to get the exact dimensions
and then cut it out
and once we cut out the first side panel
we can simply trace it onto the
cardboard for the second panel
next is time to cut some corks and i
mean a lot of corks
and you're probably wondering how many
corks do you need for this modification
well keep watching and you'll find out
soon
to cut these corks you're going to need
to steam them or boil them in water
you have to soften them up before you
can cut them
we chose to steam the corks for about 15
minutes
in small batches
then after 15 minutes let them cool for
a few minutes
take them to the cutting board
and start cutting the corks in half
right down the middle
you want the name of the winery to face
the middle of the cork
and don't worry if the cork is not split
down the middle exactly
because you want some variations
this gives the wine modification
some character
trying to make it perfect will drive you
crazy
so grab a cup of coffee and start
cutting
and keep cutting
and be careful with a knife and don't
cut yourself
and cut a little bit more
so now we mocked up the corks for our
first side panel these are not glued yet
just simply placed in a staggered
pattern
so now
we need to cut the top row
using six whole corks
i recommend here using your best corks
the ones from the most expensive wine
you kind of want to showcase them
so in these six corks
we have to cut a groove in it
to allow the cork to sit on top of the
ps5 panel and there should be enough
room for the cardboard to be glued to
the inside as well
this cork the paradox cork
is going to face the front
so you don't want to cut all the way to
the very front of the cork
so for the front of the panel it will
look uncut
and we'll do the same for the other side
of the panel as well
it's a nice clean finished look
and this part is a lot of trial and
error to get the groove deep enough
so before you do any gluing
always test spit the pieces
just like this that's how it's going to
look
perfect
now the next five corks
will have grooves cut all the way
through them which is much easier
and of course test fit it before you
glue it
to cut a large groove in the cork
you'll need to make two or three cuts
and then scrape out the middle of it
and make sure the groove is deep enough
and all six corks should have the same
thickness of groove
so the corks are all level
and once again i only use my prime corks
for the very top so once we're done here
we'll go ahead and mock it up real quick
and then glue it
so here's all six corks ready for gluing
so start with the cork in the very front
the paradox
and add glue to the cardboard not the
cork
when you place the cork onto the
cardboard
give a few seconds to make sure it's
straight and level before the glue dries
you want to press the cardboard against
the cork firmly for about two to three
seconds that's it
and then do the same with the five
remaining corks
and make sure each cork is level with
the next cork
it should look pretty straight
but not perfect
so once again simply add the hot glue
and attach the cork
and hold for a couple seconds
and then rinse and repeat
and here's one of my favorite wines opus
one
so guys and gals what is your favorite
wine leave your answer in the comments
below
for me i love camus opus swan and
duckhorn
so the last cork on the top row we're
gonna wait to attach that one
so now we're gonna transfer the corks
from the left to the right
and glue as we go
doing the staggered pattern
that second row kind of lines up with
the top row
but after that it's a staggered pattern
so now while i glue on the corks
let me explain how these panels are
going to attach to the playstation
obviously the top row hangs on top of
the playstation
in the bottom of the cardboard
we'll sit into the groove
of the ps5 stand perfectly
however we need a way to keep the side
pieces from bowing out
so our ingenious way of doing this
is every other row
we'll attach a cork it's kind of like a
hook
to grab onto the sides
and it sounds kind of complicated but
it's not
and we'll show you in depth how to do
this
okay here's how it works
you cut the cork down the middle
but not all the way
and leave a notch and this notch hooks
onto the side of the playstation you'll
need to carefully measure the length to
get this right
and because each cork is unique
in size and shape
each one of these hooks will be a little
bit different
but the concept is the same
cut down the middle
not all the way
cut across the side and now cut out a
notch
and if you're still watching my video
thank you very much i really appreciate
it
and please give us a thumbs up and share
this video thanks
and the total number of corks you're
going to need for this modification
is 112.
all right now let's go ahead and attach
the cork
and see if it fits
if the cork is too long
just shave off the end a little bit
until it fits
however this cork fits perfectly
and wherever you see that white
cardboard notch
we're gonna add a hook
so basically it's every other cork
and this will give it some symmetry
pretty cool
and if you have the playstation digital
edition
then both sides will be exactly the same
but if you have the console addition
like we have
then you're going to have to make some
adjustments around the disk drive
but don't worry we'll show you that
later
if playstation
sent us a digital edition
then we'll make a video showing how to
do that one as well
and i guarantee it will look amazing
and guys i want to encourage you to
visit my patreon page
where two dollars a month
helps keep this channel going
and our youtube channel has memberships
as well
so please consider signing up for one or
both
and thanks again for watching you guys
are awesome
so on the back side of the panel here
we're going to add one hook
around the middle area that's all we're
going to need
and then we'll fill in the rest of the
area with corks
so you can see at the bottom of the
panel
i added some more corks on that bottom
row
but had to shape them to fit around the
stand
and remember when gluing on these corks
make sure the writing is facing the same
way
you don't want any upside down corks
that would look awful
and if you have a lot of the same cork
names
try to space them out
you don't want to bunch them up together
you can see we have a lot of decoy corks
as well as josh corks
and i would avoid using any plastic
corks
it would be hard to cut
and will look pretty bad
so stick to good old-fashioned wood
corks
and here's our first panel installed
looks fantastic
there's a symmetry on the end with the
corks
looks good
now on to the other side
now on this side i'm going to focus on
the disc drive area
because that area is going to be a
little bit
different so i'll speed everything up
until i get to that point
and then i'll explain how we work around
the disk drive
but one thing you don't want to do
is install the corks too close to the
drive
because pieces of cork could go into
that slot of the disk drive
and that's no good
so our goal is to have the corks go
around the drive
at a safe distance
but still look amazing
[Music]
[Music]
so now here's the area we're going to
have to make some modifications because
of the disk drive so my thought is i'm
going to use a pencil i want to
cut out this area it goes right to here
and then i can just start doing the
corks
this way bring them down
so looking good
just taking shape
if you don't have this one you have the
digital it'll be much easier it
basically be the same as this side over
here identical so actually it'd be very
simple to do this is more complex
because i have the disk drive and by the
way i love the disk drive i think it's
better than the digital version i just
like having the disk and also place
movies
so all right
so i'm gonna have to
go ahead and make a move here
i used to cut part of this right here
out here up
so
all right
all right on the back here is the cut
out line i traced
around that disc drive so let's go ahead
and cut that
we'll do less is best you can always
take off more later
taking this off for now
let's hook it this way
that's
that looks pretty good
but i need to go test it out real quick
real quick
okay i am really
really pleased with this
this is exactly what i wanted so i'm
gonna run corks here
here and i'll do it overlap a little bit
and then when i get down to here
it'll come out a little bit but not much
it'll all be even
and come down and i'll finish off the
back
and i'll have a couple of these i need
on a couple of these in the back here
just to kind of hold it in place
so it'll be nice and tight tight you
won't see that anyways but it'll still
look really really sharp
i wanted to do the same as down here
but
i can't there's no way i don't see how
it's going to work that way maybe i can
do something here on the ends
we'll see
where i get this point you know well
you'll see so i'm kind of doing this
wing in it
winging the prayer let's see what
happens all right let's go and look
great thing about these they come right
off
both sides
no damage to your ps5
but yet the coolest
looking ps5 in the world
no one has it
guaranteed
all right i'm gonna cut some of this out
here
so i have less
paper showing
remember always less is best when
cutting so i'm going to cut here i think
i'll just end up cutting
to there and i need a piece that will go
back to here like this i can always cut
another piece off
i could do the round thing like this one
again
which i might do just to keep it
consistent for this
so here
and i'm going to cut this now here
this
like that
down here i'm just going to cut
more down here
just a little bit just shave it just a
little bit off
about
an eighth of an inch
like i said i don't want to see the
paper
all i want to see is the cork if
possible
this will help do that
we can always cut more up we need to
all right
go ahead and put this on here just the
edge
i have a whole lot here of
room get a decent amount of glue we want
this to really be
sawed
on
the paper we have
here
there's some on the back side there
okay oh sticky
dry
we'll be good to go
and then we still go on that theme you
can see
where we have
here here here so it's still the same
theme
so i decided by the disc drive to
stagger the corks this would give it
some character
at this point it was pretty easy putting
the corks down and gluing them
basically filling in spots
and on the back of the panel i did two
hooks one at the bottom and one at the
top
and here's the last two corks
and a tiny one right there
and we are all done
so guys and gals this is the world's
only playstation 5 custom wine edition
modification
however after watching this video
you could be the second person to own a
playstation 5 custom wine edition
and if you do build one send me a
picture
as far as the holder for the controller
it's pretty simple to make
there's many ways you could do this
i'll use the cork standing straight up
and cut them at different levels
to cradle the controller
and of course guys if you have any
questions feel free to ask in the
comments below
this was a very fun project and took
about two days i probably could have
done this in one day but i had to film
it so it took more time
so guys we're all done here
and i want to thank you so much for
watching
and guys remember if you like this video
give a thumbs up and share it
if you're loving it hit subscribe to
keep this channel alive
thanks again for watching and i'll see
in the next video real soon
have an awesome day
do
you