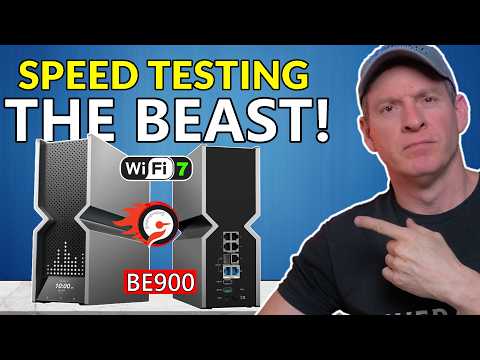
The TP-Link Archer BE900 is a flagship quad-band Wi-Fi 7 router built for serious home networks, high-speed fiber internet, large file transfers, and users who want fast wired and wireless performance. In this review, we look at the router's ports, setup process, wired speed test results, Wi-Fi 7 performance, MLO band, Tether app controls, and whether this router makes sense for a high-speed home network.
The TP-Link Archer BE900 is designed for users who want a premium Wi-Fi 7 router with serious wired networking options. This is a quad-band router, giving you one 2.4 GHz band, two 5 GHz bands, and one 6 GHz band. That makes it especially useful for homes with many connected devices, Wi-Fi 7 laptops, smart home gear, streaming devices, gaming systems, and high-bandwidth workstations.
One of the biggest highlights is the wired port selection. The Archer BE900 includes two 10 gig ports, including an SFP+ fiber port, four 2.5 gig ports, one 1 gig LAN port, and two USB ports. For anyone with a multi-gig internet plan or a local network used for large file transfers, this router has the hardware to support a much faster home network.
Inside the box, the Archer BE900 includes the router, installation guide, EasyMesh setup guide, Ethernet cable, power brick, power cable, and reset pins. The router itself has a premium look, with a large front LED touchscreen display and plenty of ventilation around the body.
The rear of the router is where the BE900 really starts to stand out. The combination of 10 gig, 2.5 gig, 1 gig, USB, and SFP+ connectivity makes this router more capable than a standard home router. The only minor complaint from the unboxing is the external power brick, which can be a little bulky to place cleanly in a network setup.
Setup is handled through the TP-Link Tether app. After powering on the router, the app walks through adding the device, scanning the QR code, connecting to the router, and setting up the internet connection.
During setup, it is important to create a strong admin password. A long password of at least 16 characters is recommended for better router security. The same applies to the Wi-Fi password. Using a strong password, changing the default SSID, and enabling automatic firmware updates are simple steps that help keep the router more secure.
For the wired speed test, the router was connected using a Cat 6 cable through one of the 2.5 gig ports. The internet connection used in the test was a 2 gig fiber plan with 2 Gbps download and 1 Gbps upload service.
| Test Type | Download Speed | Upload Speed |
|---|---|---|
| Wired 2.5 gig port | 2.166 Gbps | 1.044 Gbps |
The wired performance was excellent and slightly exceeded the expected internet speed. For users with multi-gig fiber, NAS systems, high-end workstations, or a 10 gig switch, this router has the wired capacity to support a very fast home network.
Wireless testing was performed using an ASUS Zenbook S16 laptop with a Wi-Fi 7 chipset. Testing included the 2.4 GHz band, 5 GHz band, 6 GHz band, and MLO band. Close-range testing was performed from about two feet away from the router.
| Wireless Band | Close-Range Download | Close-Range Upload |
|---|---|---|
| 2.4 GHz | 244 Mbps | 38 Mbps |
| 5 GHz | 1,849 Mbps | About 1 Gbps |
| 6 GHz | 1,838 Mbps | 1,059 Mbps |
| MLO | 1,660 Mbps | 1,047 Mbps |
The 5 GHz and 6 GHz bands produced very strong speeds, while MLO delivered a fast and stable connection by combining bands. MLO is disabled by default, so users with Wi-Fi 7 devices should enable it through the Tether app and reboot the router.
The BE900 also performed extremely well at longer distances. Testing was performed around 50 feet away and again around 75 to 80 feet away with no direct line of sight to the router.
| Distance | Band | Download Speed | Upload Speed |
|---|---|---|---|
| 50 feet | 2.4 GHz | 41 Mbps | 34 Mbps |
| 50 feet | 5 GHz | 891 Mbps | 121 Mbps |
| 50 feet | 6 GHz | 1,340 Mbps | 74 Mbps |
| 50 feet | MLO | 846 Mbps | 278 Mbps |
| 75 to 80 feet | 2.4 GHz | 28 Mbps | 7 Mbps |
| 75 to 80 feet | 5 GHz | 797 Mbps | 182 Mbps |
| 75 to 80 feet | 6 GHz | 957 Mbps | 343 Mbps |
| 75 to 80 feet | MLO | 825 Mbps | 141 Mbps |
These range test results are excellent, especially for the 5 GHz, 6 GHz, and MLO bands. The router maintained strong wireless speeds even from around 80 feet away, which makes it a strong choice for larger homes or users who need high-speed wireless coverage in multiple rooms.
The TP-Link Tether app provides access to the main router controls. The network tab shows connection status, download rate, upload rate, connected clients, traffic, and screen display options. The security tab includes device isolation, and the family tab includes parental controls.
The more tab includes additional settings such as Wi-Fi settings, screen display customization, block list, QoS, quick setup, internet connection, guest network, IoT network, EasyMesh, eco mode, network optimization, diagnostics, operation mode, advanced settings, manager settings, and system settings.
The front display is one of the more unique features of the BE900. Through the app, users can change the LED screen animation, add text, use prebuilt display options, or customize the visual style. It is not required for performance, but it gives the router a more premium and modern feel.
The TP-Link Archer BE900 is a powerful Wi-Fi 7 router built for users who want top-tier performance. The wired speeds are excellent, the wireless range is outstanding, and the port selection makes it ready for multi-gig internet plans and advanced home networks.
This router makes the most sense for users with high-speed fiber internet, Wi-Fi 7 devices, large homes, heavy file transfer needs, or plans to build a faster wired network with a 10 gig switch. If you only have basic internet service or mostly older Wi-Fi devices, the BE900 may be more router than you need. However, for high-performance home networking, this router is seriously impressive.
Hey, what is up? How are you doing? Welcome back. In today's video, we are taking a look at TP-Link's flagship Wi-Fi 7 router, the BE900.
This thing is a beast. It is a quad-band Wi-Fi 7 router, which means you get four bands: one 2.4 GHz band, two 5 GHz bands, and one 6 GHz band.
On the back of the router, you get two 10 gig ports, and one of them is a fiber port. You also get four 2.5 gig ports, one 1 gig LAN port, two USB ports, one USB 2.0 port, and one USB 3.0 port. The cool part is the LED touchscreen on the front. Pretty cool.
With all these features, this should be a pretty impressive router. Today, we are going to unbox it, set it up, test it, and review it. At the end of the video, I will tell you whether you should buy this router or take a hard pass.
I am Michael Scott, and not the one from The Office.
The BE900 is a true 10 gig router, which could be ideal for users with multi-gig ISP plans or people who require large file transfers. However, you will need a 10 gig switch for additional ports.
The 10 gig switch shown here is the TP-Link TL-SX105, a 5-port 10 gig unmanaged switch. When you pair these two devices together, you can build a true 10 gig network. Just remember that your wired end devices also need to be 10 gig compatible.
All right, let's get this router unboxed.
Inside the box, we have the installation guide, the EasyMesh setup guide if you are going to use more than one router, some additional documentation, an Ethernet cable, the power brick, the power connection, and two reset pins. I am not sure why there are two reset pins, but you get two of them.
Now let's check out the router. I am really excited about this. I love the smell of a new router. It smells so good.
On the front, you can see where the LED screen and touchscreen are located. On the back, you can see all the ports. You have the four 2.5 gig ports, the 10 gig ports, the 1 gig port, and the SFP+ fiber port. You also have the USB 2.0 and USB 3.0 ports, the power button, the reset button, and the power connection.
The router also has plenty of ventilation on the sides and bottom. There are pads on the bottom to keep it level. Overall, I like the design a lot.
The power brick is the usual external style. I wish it were built into the router because these can sometimes be a pain to place cleanly. The included Ethernet cable is a flat style cable, which I do not really like, so I am going to use my own Ethernet cable.
Now let's get it set up. We plugged in the power and turned it on, and the LED screen looks pretty cool. Next, we are going to connect it to the internet.
For this setup, I am using a Cat 8 cable because I have Cat 8, but you can also use Cat 6. We are going to plug it into one of the 10 gig ports. We currently have 2 gig fiber from our ISP, so all of today's testing will max out at 2 gigs download and 1 gig upload.
Next, we download the TP-Link Tether app, open it, and select add device. The app says to power on the router and wait for the LEDs to become stable. Then we scan the QR code on the back of the router.
After scanning the code, the app connects to the device and finds the router. Now we can begin the setup process. The Cat 8 cable is already connected to the modem through the 10 gig port.
Next, we set the admin password. When setting up your admin password, make sure it is 16 characters or longer. This is one of the best ways to help secure your router.
If you have seen recent news about routers getting hacked, one of the main reasons is that many people do not change the default admin password, or they use a password that is too short. Use 16 characters or more.
After that, we set the SSID name and Wi-Fi password. Once again, make the password very long. The router also asks us to set up the 6 GHz SSID and password. I am using the same network name, but I am adding "6 GHz" to the end so I can easily tell when I am connected to that band.
For updates, I set the update time for early in the morning, from 3:00 a.m. to 5:00 a.m., and I enabled automatic updates.
One thing I want to mention is the FCC router ban. This ban applies to new routers only. This router is not banned, and neither are routers made before the ban. These routers are safe to use. Just make sure you change the admin password to a long password, change the SSID name and password, and enable automatic firmware updates.
The first test is a wired speed test. For this test, we are using a Cat 6 cable plugged into one of the 2.5 gig ports on the back of the router. The other end is plugged into the computer.
Once the computer is online, we run the speed test using fusionconnect.speedtestcustom.com. The results look really good. The download speed is 2.166 Gbps, and the upload speed is 1.044 Gbps.
That is incredible, and it is actually faster than the speed I should be getting from my ISP.
Now we are going to test wireless performance using an ASUS Zenbook S16 laptop with a Wi-Fi 7 chipset.
First, we test the 2.4 GHz band from about two feet away from the router. The 2.4 GHz band reaches 244 Mbps download and about 38 Mbps upload, which is pretty typical for that band.
Next, we test the 5 GHz band. This router has two 5 GHz bands, which is great because it can help reduce congestion. On the 5 GHz band, we get 1,849 Mbps download and around 1 Gbps upload.
Then we switch to the 6 GHz band, which is the fastest band. The 6 GHz band reaches 1,838 Mbps download and 1,059 Mbps upload.
The last close-range wireless test is the MLO band, which stands for Multi-Link Operation. This combines bands together for a more stable connection.
If you have Wi-Fi 7 devices, you should definitely enable the MLO band. By default, it is disabled on this router. You need to go into the app on your phone, enable it, and then reboot the router.
On the MLO band, we get 1,660 Mbps download and 1,047 Mbps upload. That is very fast.
Next, we test the router from about 50 feet away.
Next, we move about 75 to 80 feet away from the router.
Those are very impressive numbers from about 80 feet away with no direct line of sight to the router. That is outstanding. The strong performance is likely helped by the 12 antennas inside this router.
I have tested dozens of Wi-Fi 7 routers, and these are the best performance numbers I have seen. The wired speeds are amazing, but the wireless speeds are off the chart. The BE900 is outstanding when it comes to Wi-Fi performance.
Now let's talk about the Tether app that controls the router.
The first tab is the network tab, which shows what is happening with the router. It displays whether the router is working properly, the download rate, upload rate, status, clients, traffic, and screen display information.
The second tab is the security tab. This includes device isolation, and you can add devices there if needed.
The next tab is family, where you can set up parental controls to block adult websites or other unwanted content.
The more tab includes the rest of the settings, including Wi-Fi settings, screen display, block list, QoS, quick setup, internet connection, guest network, IoT network, EasyMesh, eco mode, network optimization, network diagnostics, operation mode, advanced settings, manager, and system.
One of the cool features is the front screen. In the Tether app, you can go to screen display and change what appears on the front of the router.
You can choose different animations and display styles. There are options that look like a camera, an ice cream cone, a bouncing animation, a hello message, and even a Pac-Man style animation. You can also add your own text, create your own animation, or choose from different slide-style display options.
In the Wi-Fi settings, I turned off Smart Connect. Smart Connect combines the 2.4 GHz and 5 GHz bands together, but I wanted to test each band individually.
The app lets you manage the 2.4 GHz band, both 5 GHz bands, the 6 GHz band, and the MLO band. Again, the MLO band is turned off by default, so I recommend turning it on if you have Wi-Fi 7 devices.
Under advanced settings, you can access features like VPN client, VPN server, static routing, and more. In the system section, you can set a reboot schedule and check for firmware updates.
Always check for firmware updates when setting up a router. When I first installed this router out of the box, it needed an update right away.
This is the TP-Link Archer BE900 Wi-Fi 7 router. It has outstanding Wi-Fi, even from 80 feet away, and the wired connections are amazing. It includes two 10 gig ports and four 2.5 gig ports, which means it can handle ISP plans up to 10 gigs.
One 10 gig port can be used as the WAN port, and the other can be used as the LAN port. If you add a 10 gig switch, you can build a 10 gig internet connection throughout your house, assuming your devices support it.
If you have a high-speed internet connection, this router is the answer. The Wi-Fi speeds are insane, and the wired speeds are off the charts.
Thanks for watching. Make sure to like, share, subscribe, and comment. For God's sake, smash the bell icon, and I will see you later. Peace.
Thank you to ASUS for sending us the RT-AXE7800 wifi6e Performance Router! Check out the RT-AXE7800 Wi-Fi 6e router on ...

These are our TOP 5 BEST Wireless Gaming Router\'s for 2024 and going into 2025! Product links are listed below. Please ...

Welcome back to Home Networking For Beginners!! On today\'s episode we will show you "How To Install Low Voltage Wires" in ...

These are my Top 4 MUST Have Home Networking Tools for Professional and Amateur Network Cable installers. There are ...

Best Wireless Routers for High Speed Internet! (2026) Top 5 Wireless Router Product Links: ( Amazons Top Deals! ) ASUS ROG ...

Do you want Faster Wi-Fi Speeds? This video shows you 1 simple setting to get faster Wi-Fi speeds! This works for all Wireless ...