Looking for an affordable and reliable tail light for your bike? In this guide, we unbox, install, and test the Vastfire remote control bike direction light—perfect for enhancing nighttime cycling safety. With multiple light modes, easy USB charging, and waterproofing, this light kit adds both function and flair to your ride.

The Vastfire light kit is designed for bike riders who prioritize visibility and ease of use. Here's what it includes:
Installation is quick and tool-free using the provided mounting clips. You may need to remove any existing reflectors to fit the tail light on your seat post. The remote easily clips onto the handlebar, and the remote is pre-paired with the light. If you need to re-pair it, just hold the power button for a few seconds.
We tested this light in a neighborhood with no street lights. The red and blue lights are extremely bright, visible from approximately 150 feet away. The remote worked well during movement, but make sure to mount it close to your thumb for better control of the turn signals while riding.
The Vastfire remote-controlled light is great for both front and rear bike installation. It enhances safety without breaking the bank—priced under $19. With weatherproofing, long battery life, and reliable visibility, it’s a smart choice for cyclists of all levels.
Hi guys! In today’s episode, we're taking a look at a remote-controlled bicycle direction light from Vastfire. I'm Mike, and welcome to the Ultimate Tech Hub!
Bicycle safety is incredibly important. A good lighting setup can significantly improve visibility and safety—especially at night. Today, we’ll unbox, install, and test the Vastfire intelligent tail light.
Features:
Inside the box, you’ll find the remote with a handlebar bracket, the main tail light with a mounting bracket, and a USB charger. Vastfire recommends using only their charger. Charge time is 1–2 hours, and it gives you 4–6 hours of light.
Also included are two mounting clips—one for the light and one for the remote. There’s even a backup battery for the remote, which is a nice touch.
Let’s install it! I had to remove the red reflector from my mountain bike to fit the tail light properly. I attached the clip to one side of the bracket, wrapped it around the bar, and snapped it into place. The light powers on easily.
For the remote, I mounted the bracket to the handlebar using the same method. Then, I clipped the remote into place. The remote is already paired with the light, but if you need to re-pair, just hold down the power button for about 5 seconds.
Night Testing: I rode through my neighborhood where there are no street lights. The lights were clearly visible from about 150 feet away. They were very bright, especially the red light. I found it helpful to position the remote close to my hand so I could easily use the turn signals without letting go of the handlebar.
Overall, the light works great both at night and during the day. You can even install it on the front of your bike if you’d like.
If you're looking for an affordable, remote-controlled tail light for your bike, this one’s a solid choice—especially at under $19. Thanks for watching! If you like these videos, give a thumbs up and share. If you love them, hit subscribe. See you in the next one!
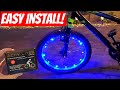
Welcome back to another episode of the Ultimate Tech Hub. Today we are installing bike wheel lights. The product that we are ...
Should you Install a Full Motion TV Wall Mount or a Fixed TV Wall Mount? Watch this video to find out which is the BEST OPTION!

Welcome back to The Ultimate Tech Hub. If you want an easy outdoor lighting solution for your driveway, front yard, backyard, ...

Sony\'s Back! Sony\'s new noise cancelling gaming headphones, the Sony Inzone H9 II are long-awaited and awesome but there a ...
Welcome back to The Ultimate Tech Hub. On today\'s episode we will unbox, assemble and review the 62 inch Grand White ...

Welcome back to The Ultimate Tech Hub. On today\'s episode we breakdown some secret features of the PlayStation DualSense ...