A wired Ethernet connection offers a stable and faster network experience compared to Wi-Fi. This guide will show you how to professionally install an Ethernet cable through a wall and set up a Cat6 wall jack for seamless connectivity.

Identify the best location for the Ethernet wall jack. Use a measuring tape to align it with an existing network connection in another room.
| Pin | Color (T568B) |
|---|---|
| 1 | White/Orange |
| 2 | Orange |
| 3 | White/Green |
| 4 | Blue |
| 5 | White/Blue |
| 6 | Green |
| 7 | White/Brown |
| 8 | Brown |
Running an Ethernet cable through a wall is an effective way to improve your home network. With proper planning and the right tools, you can achieve a professional installation that enhances connectivity and aesthetics.
hey guys on today's episode i'm going to show you how to run a network cable from one room through a wall into another room and make it look like a professional installation it cost us around 20 coming up next on the ultimate tech hub [Music] so guys let me show you what my plan is for my new network wall jack i have a single wall that separates my family room from my master bedroom in our family room we have a network cable that comes out of the wall and connects to our tp-link 8-port switch this switch connects to our ps4 our roku box our tv and a desktop computer so i have extra ports available on this switch so my plan is to plug a kassix cable into the switch and run that cable through the wall into my master bedroom and that will connect to a new network wall plate and that wall plate will have a cat6 jack and this installation will look professional so now we'll have wired internet in our master bedroom are the required parts for the install first you'll need a cat6 jack you'll need a one port wall plate two drywall anchors that fit the screws and you'll need some cat6 cable my cable is about 10 feet but the link to that cable will depend on the new location of your new wall jack so now let's take a look at the required tools for this installation you'll need a cordless drill various drill bit sizes a hammer a measuring tape and a drywall saw and here a few more tools you may need a wire stripper a pencil and a crimping tool if you're going to make your own patch cables so the first thing i'm going to do is measure from where the coax cable comes out of the wall in the family room and then i'll measure the master bedroom that same distance so this way when i drill the hole from the family room into the master bedroom i have an idea where it's going to come out so now i'm going to take off the wall plate and this will allow me to seam to the wall to where i'll be drilling it's really important to make sure the area i'm going to be drilling has no wires in front of it i saw no wires and i used the measuring tape just to tap on the wall and we're good to go the area behind my guitars is where i'm going to put this wall jack the hole will be near the bookcase so now you'll need a drill bit for your cordless screwdriver use the largest bit you have the drill bit i'm using is used to go through thick walls however you can use a smaller drill bit just make sure the drill bit is long enough so it can go through the other side and here will be the location of our new wall jack so now i'm going to use a drywall saw to enlarge the hole i want the hole big enough to fit the back of the wall plate there's a rectangular area that sticks out and that's where the cat6 wall jack goes into and don't forget hit subscribe to keep this channel alive so when you remove drywall less is best take your time and shape around the air you want to remove and test it with a wall plate and nope not big enough so gradually remove the drywall until the back of that wall plate fits in the hole and the wall plate will sit flush against the wall and we'll remove a little more drywall and it fits perfect now it's time to connect the cat6 jack to the cat6 cable this cat 6 jack will cost around five dollars you get the castics ball jack you get the punch down tool and you also get a wire cover we'll also need some cat6 cable this roll of cable is about 10 feet i'm gonna cut it in half that's all i'm going to need after cutting the wire in half go ahead and strip back the blue wire cover so this end connects to the cat6 wall jack and this end connects to the switch i have done a video on how to install a kasich's wall jack and here's a link to that video cut off the white string next unravel all the wires after you unravel all the wires it's time to place the wires into the wall jack slots and this is how you do it so the bottom left is white orange above that is orange make sure to use the punch down tool to push them all the way down the next color above the orange is brown and above that is white brown once again use the punch down tool the wires need to go all the way down okay the left side is done time for the right side bottom right wire is green and above that is green white and next above that is blue white then above that is blue now take the punch down tool and push all the wires down just one more time and we're done next trim off any excess wire and now add the wire cover okay looks good we're ready to go next insert the casics wall jack into the wall plate next go ahead and feed the wire through the wall to the other side now i'll go ahead and plug it into the eight port switch push the wires back in and do a test fit looks good next use a pencil to mark for the holes for the anchors now simply drill the holes for the anchors start small then get a little larger you want the anchors to be snug in the drywall use your hammer to tap it in and the bottom one didn't require a hammer and the last part attach the wall plate with the two screws and then you're done and this wall plate looks like a professional installation and total cost was 20 so how do i know if this ethernet even works well let's test this out on our streaming device and guys if you have any questions about this installation please leave them in the comments down below and as always if you don't feel comfortable working with ethernet wires and drilling through walls then be sure to hire a professional and we're connected well guys as usual i want to thank you so much for watching and if you like these videos give a thumbs up and share it if you love them hit subscribe it's free thanks again for watching you

This is the "Easy Ethernet Wall Jack Installation" that uses a 45-degree Cat6 Keystone Jack from SatMaximum. These 45-degree ...
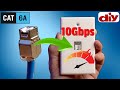
This is "How to Install a Cat6a Keystone Wall Jack that provides up to 10 Gbps!" Remember you will need 10Gbps compatible ...
This is the "Easy Ethernet Wall Jack Installation" that uses a 45-degree Cat6 Keystone Jack from SatMaximum. These 45-degree ...

How To Wire Up Ethernet Plugs The Easy Way (And The Professional Way!) Have you ever wondered which RJ45 Connector you ...

How to wire up Cat6a UTP the easiest and best way! This is a detailed "How-To" video on Cat6a Unshielded Twisted Pair ...

Welcome back to The Ultimate Tech Hub. On today\'s episode we will connect a Cat6 ethernet cable to a Cat6 Wall Jack and we ...